
Materials:

Jelly Roll or Fabric scraps
Felt Scrap
Headband
Hot Glue Gun
Iron
Steps:
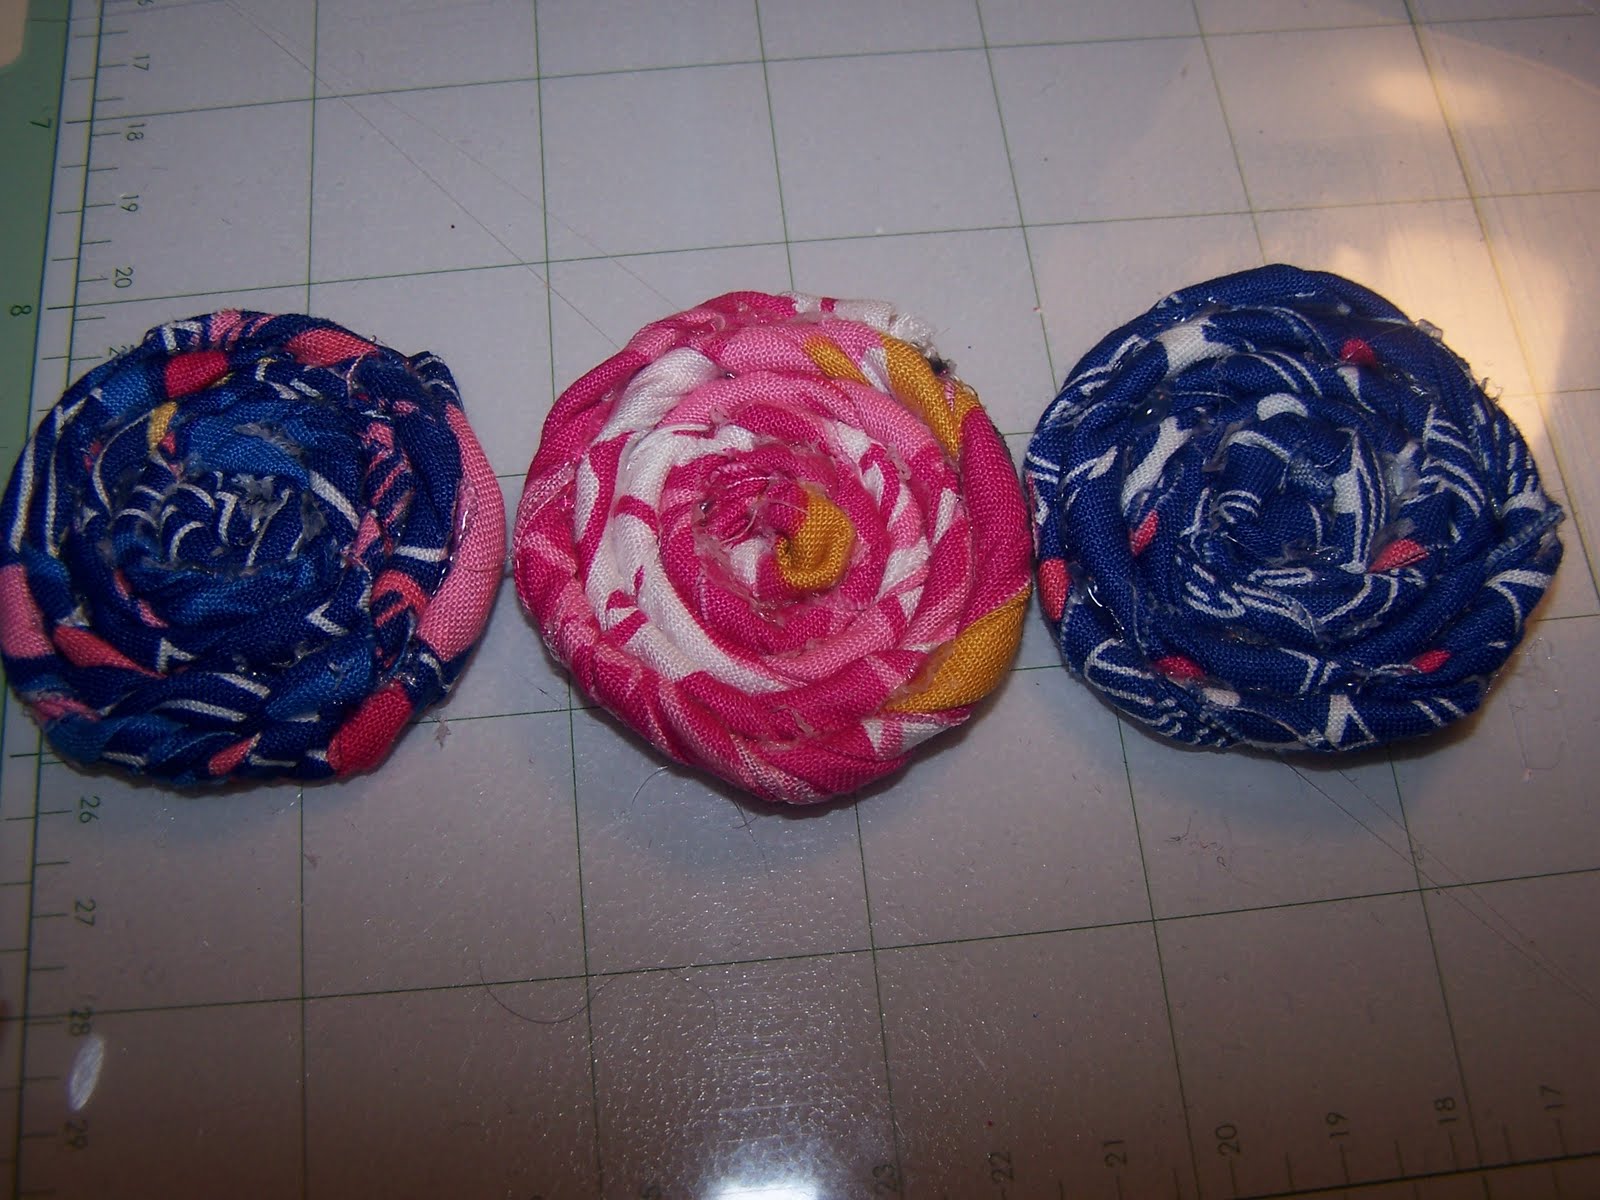
1. Cut your fabric strips to approximately 22x2 inches (doesn't have to be perfect).
2. Cut 3 circles out of your fabric that are approximately 1.75 inches in diameter (I actually used felt for this part, either works).
3. Cut 3 circles out of felt that are 1.5 inches in diameter (I made 2 headbands, hence all of the circles).

4. Using your iron, fold each fabric strip into thirds and press, with the right side of the fabric out. (Please ignore the water stains on my ironing board cover, lol!).


5. Glue down one end of the fabric strip to the center of the fabric circle.

6. Coil the fabric AND twist it around the center, gluing as you go, securing to the fabric circle.

7. After the entire fabric strip is coiled, twisted & glued, snip off any excess from the fabric circle that is showing.
8. Repeat making 3 rosettes.
9. Put some glue on the back of a rosette and attach the headband, making sure to attach the outside of the headband to the rosette.
10. Smear glue all over one of the felt circles.
11. Glue the felt to the back of the rosette, sandwiching the headband between both.

12. Repeat with the other 2 rosettes. Be aware of the spacing of the rosettes. The flowers will stretch out when the headband is put on your head.


No comments:
Post a Comment