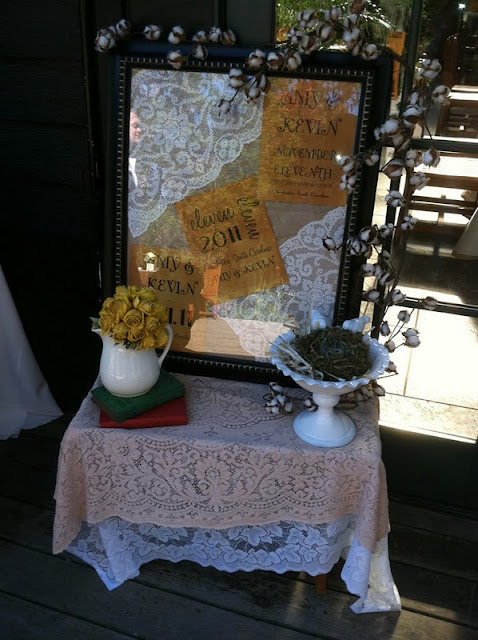
photo courtesy of Kat Cole & Laddy Kortekaas Photography
The diaper flaps open up to reveal the shower information.
I was also asked to do some wedding prints for friends that got married on 11-11-11 in Charleston, SC. The wedding was very country-chic with lots of burlap & lace {& boots of course} so I dyed the paper and printed away. They were displayed in a vintage frame outside of the reception hall.
photo courtesy of Lisa Stevens
And I totally have to share this nail tutorial with you. I've seen the nail skins that are for sale in the beauty aisles but they are too expensive for my wallet. So I just stick to painting my nails like normal. But when I saw THIS I thought it was too good to be true. Nail skins for FREE? And yes it totally works. I did this in about 15 minutes last night. I must add, I was so skeptical that I didn't bother to take my time painting my nails and I basically just let the paint fall where it may - even if that meant on the outside of my nails. Whatever. And I didn't bother to tidy them up after I was done because I was so excited about how they turned out. So don't critique my painting skills. You are supposed to be like "wow that is awesome!" It's the little things that make me happy...
Yeah, I know. My cuticles need work. The tutorial says to use digital scrapbook paper but I was not about to purchase any of that stuff to put on my nails. I'll just go the the nail shop if I want to spend money. The point of this is to be free! Since the chevron pattern is all the rage right now I googled "chevron image" and found one that I liked. Then I used Publisher {I don't have Photoshop like the tut says} and I resized the image to .75 x .75 inches and copied and pasted it about 20 times {enough for some re-dos if need be, but I didn't need them}. Then I decided that I wanted a small heart on my ring finger as opposed to the pattern so it would stand out. I found an image that I like and resized it on to my publisher document. This is how my document looked.
See, plenty of extras in case I messed up. Then I just cut them out and followed the tutorial using rubbing alcohol. I used a clear coat that has a little glitter in it for a little extra shine and I was all done! Super easy...just think of all of the possibilities with this!


No comments:
Post a Comment